
Three controls introduced in Kemicard v2.29: a rotating barcode that makes a screenshot useless within seconds, sharing rules that decide which wallets a pass may reach, and a private member photo that no longer forces a screen-lock prompt. Each is configured per template in Kemicard Studio, so different passes can carry different protections.
1. Rotating barcode — a code that expires in seconds
Rotating Barcode replaces the static QR code on a Google Wallet pass with one that refreshes every few seconds. Every pass issued from an enabled template carries its own secret, and the Kemicard Scanner validates the current code live at the door. A screenshot taken a minute earlier no longer matches anything.
| What it does | Why it matters |
|---|---|
| Replaces the static QR code with a code that refreshes on an interval you set. | A screenshot of the pass goes stale almost immediately, so a captured image cannot be reused to get someone else through the door. |
Where it lives
Kemicard Studio → Settings → Barcodes → Rotating Barcode (Google)
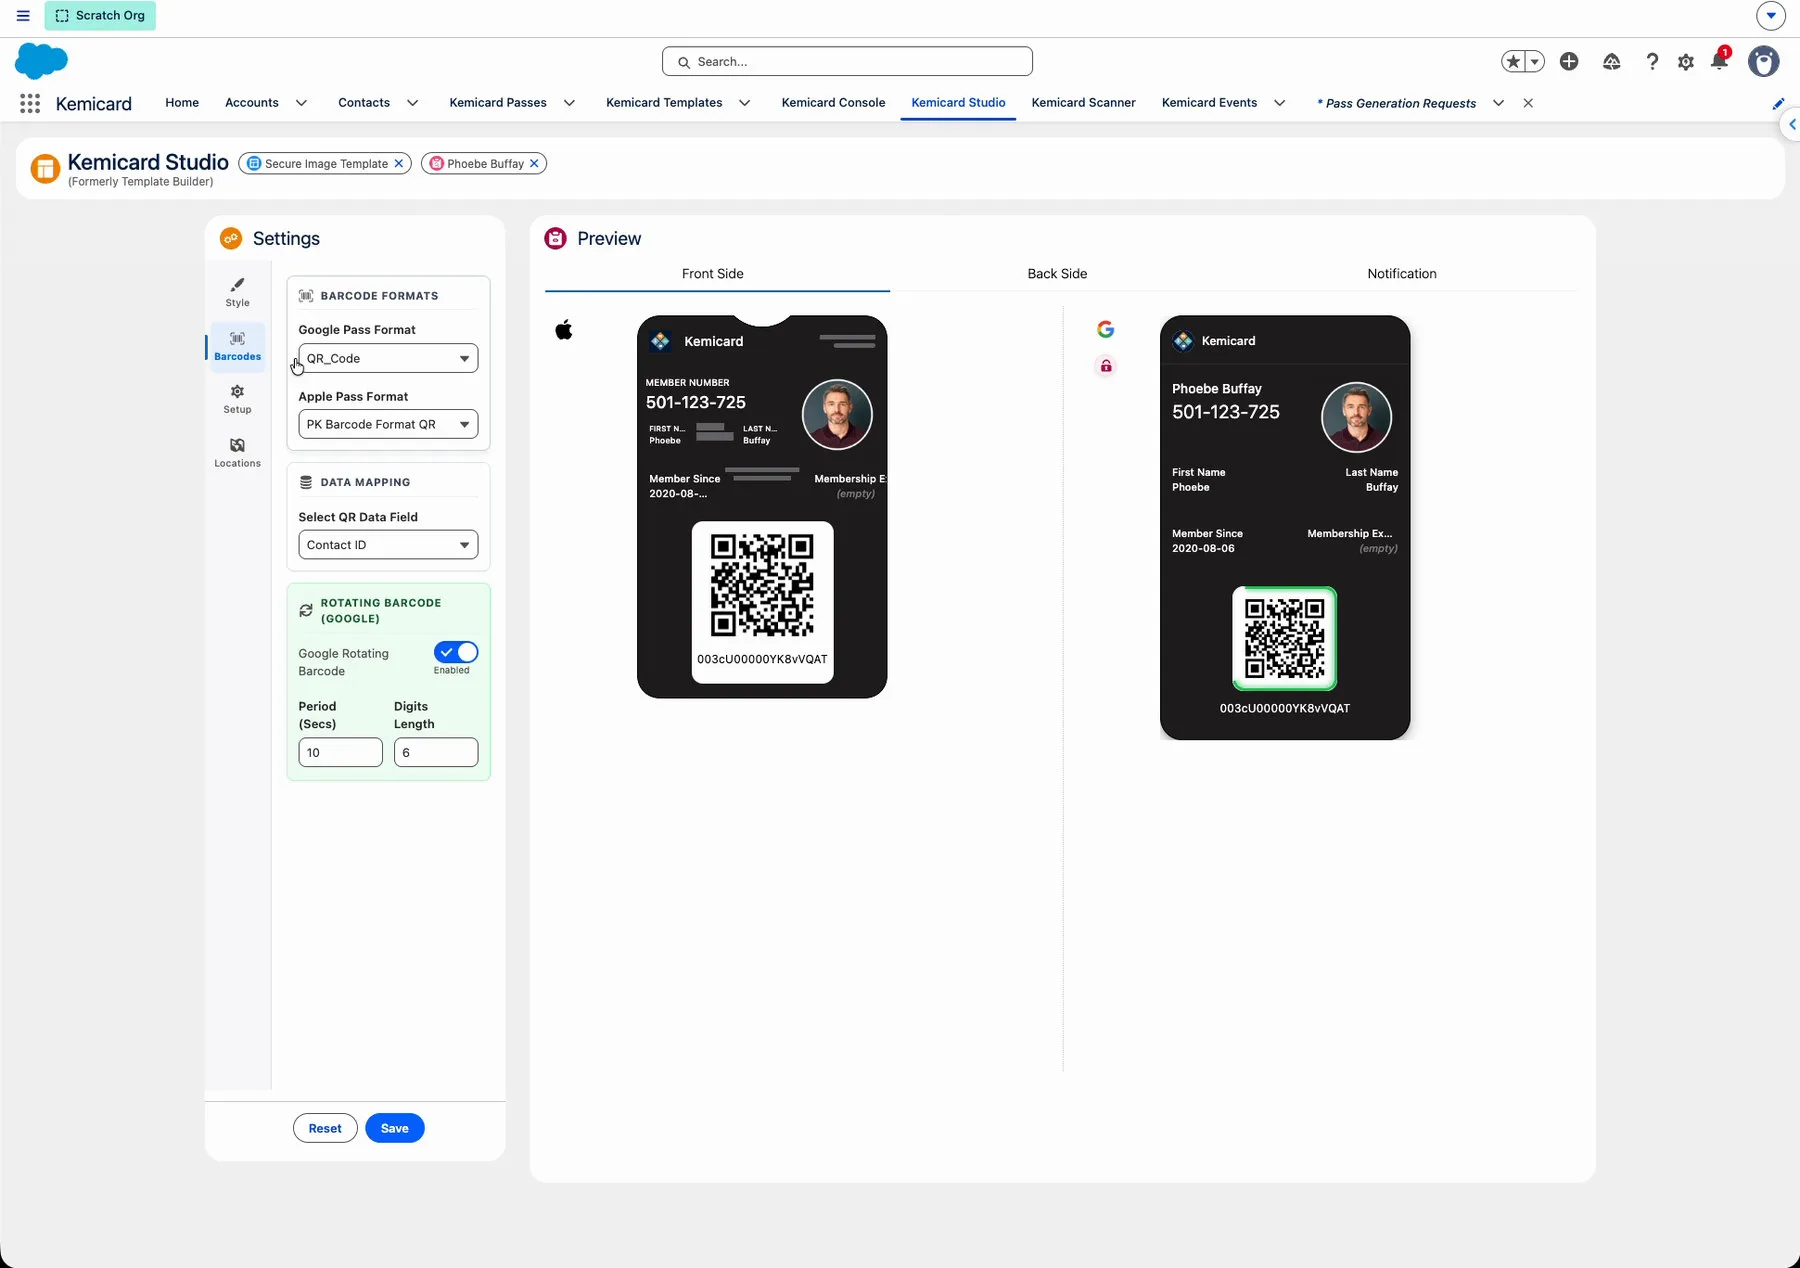
- Open your template in Kemicard Studio. Click the Kemicard Studio tab in the app's top navigation. If no template is open, go to Kemicard Templates, open your template, then click Open in Kemicard Studio. You will see a Settings panel on the left and a Preview on the right.
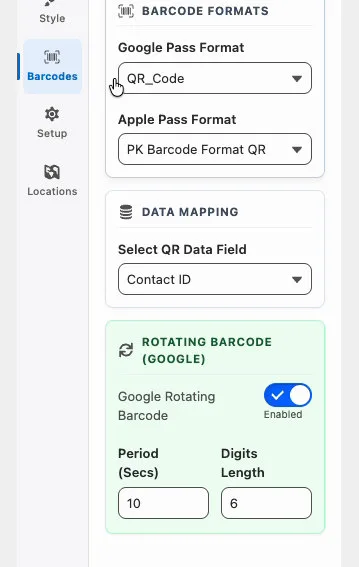
- Open the Barcodes settings. Click the Barcodes icon in the left icon rail. The panel shows Barcode Formats, Data Mapping, and the Rotating Barcode card.
- Turn the rotating barcode on. In the Rotating Barcode (Google) card, click the Google Rotating Barcode switch so it reads Enabled. Two fields appear.
- Set how often the code refreshes. In Period (Secs), type the refresh interval — default 20 seconds, allowed 5–600.
- Set the code length. In Digits Length, type the number of digits — default 6, allowed 6–8.
- Save. Click Save at the bottom of the Settings panel. The Google preview updates to show the rotating QR code.
Field reference
| Setting | What it controls | Default | Range |
|---|---|---|---|
| Google Rotating Barcode | Turns the rotating (dynamic) barcode on or off for this template. | Off | On / Off |
| Period (Secs) | How often the barcode refreshes to a new value. | 20 sec | 5–600 |
| Digits Length | Number of digits in each rotating code. | 6 | 6–8 |
2. Pass sharing controls — decide which wallets a pass may reach
Not every pass should travel. v2.29 turns that decision into a template setting, handled separately for each wallet — so you can restrict one platform without touching the other.
Sharing is configured on the back of the pass in the Preview panel.
Getting to the sharing settings
Kemicard Studio → Preview → Back Side → share icon
- Open the template in Kemicard Studio so the Preview panel shows on the right.
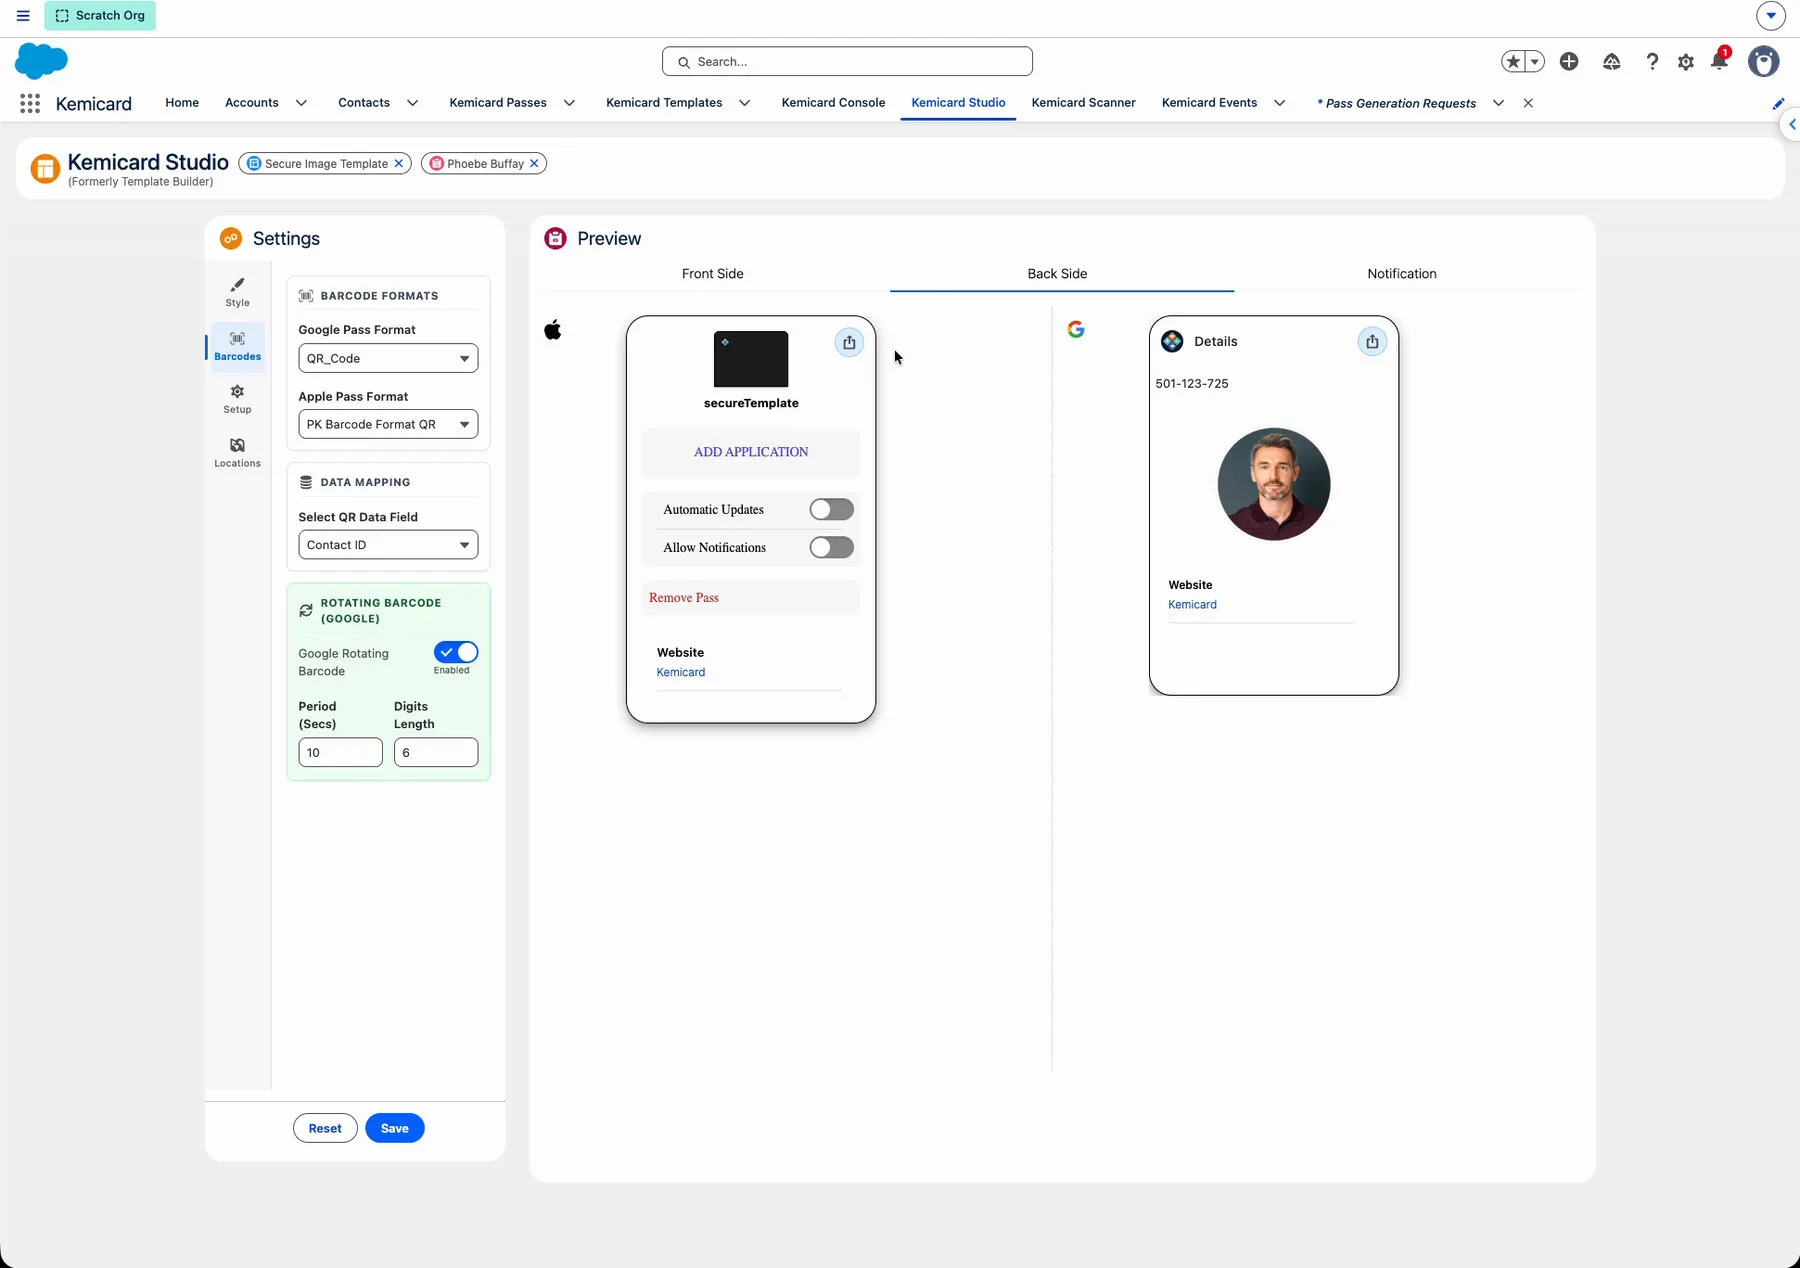
- In the Preview panel, click the Back Side tab.
- Each pass card has a share icon in its top-right corner. Click it on the Apple card to open Apple's settings, or on the Google card to open Google's.
Apple Wallet — on or off
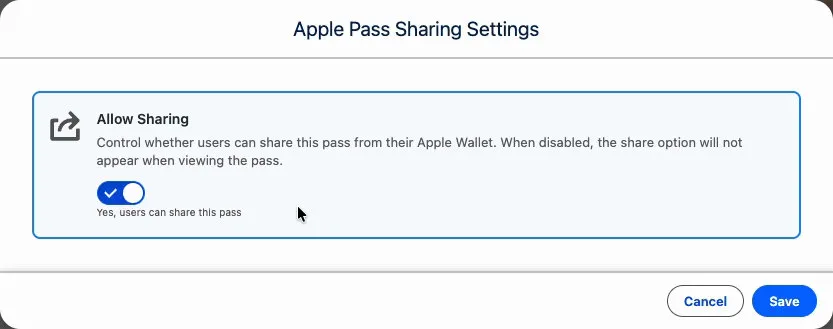
Apple sharing is a single switch. In Apple Pass Sharing Settings, turn Allow Sharing off to restrict it — the Share option then will not appear when the member views the pass. Click Save.
Google Wallet — four levels
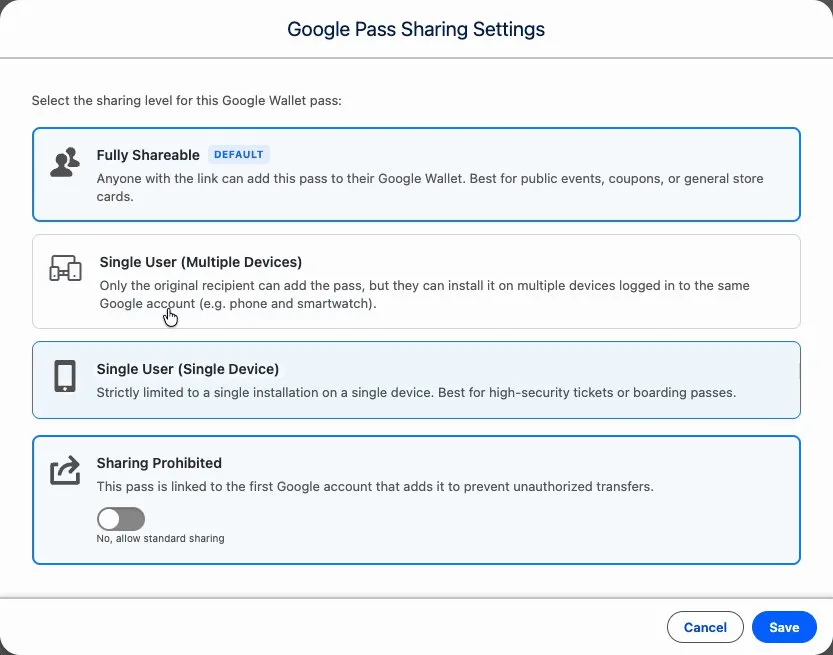
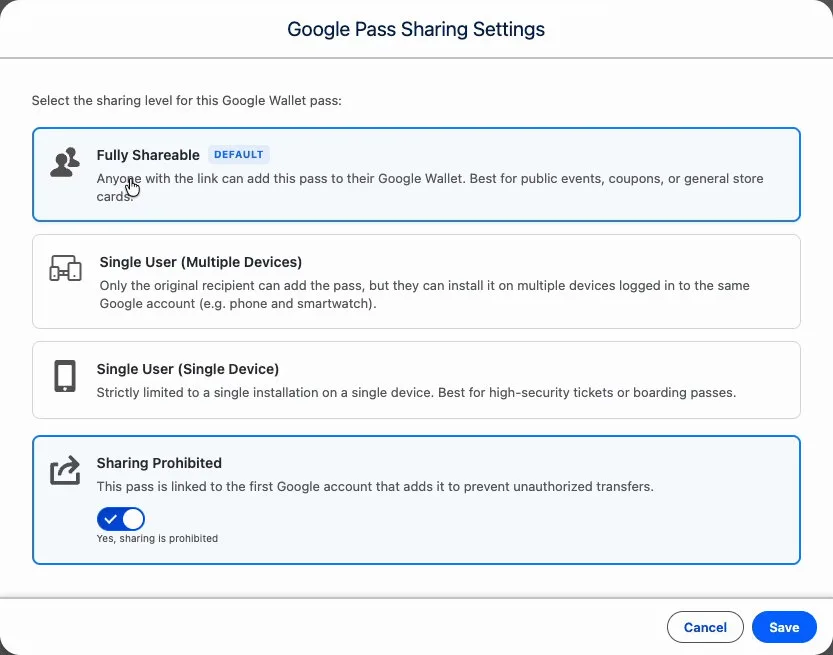
Google Wallet passes get finer control. Three of the four levels map to Google's own sharing settings; Sharing Prohibited is Kemicard's, possible because Kemicard never exposes the plain pass URL and so decides when the add-to-wallet link expires. In Google Pass Sharing Settings, choose one of the four levels and click Save.
| Level | Google value | What it does | Best for |
|---|---|---|---|
| Fully Shareable (default) | MULTIPLE_HOLDERS | Anyone with the link can add this pass to their Google Wallet, on any device. | Public events, coupons, general store cards. |
| Single User (Multiple Devices) | ONE_USER_ALL_DEVICES | Locks to the first Google account that saves it. Forwarding the link achieves nothing, but the holder can install it on several of their own devices. | Personal memberships used on a phone and a smartwatch. |
| Single User (Single Device) | ONE_USER_ONE_DEVICE | Most restrictive — a single installation on a single physical device, no exceptions. | Secure transit tickets, boarding passes. |
| Sharing Prohibited | — | Sharing is off. The pass links to the first Google account that adds it; nothing else can add it. | IDs and tickets that must never circulate. |
3. Private Image — a member photo without the screen-lock prompt
A member photo is the fastest identity check a door attendant has. Until this release, showing a private image on a Google Wallet pass required a Secure Pass, and a Secure Pass asks the member to unlock the phone before the image appears — which is a real cost when someone is holding up a queue.
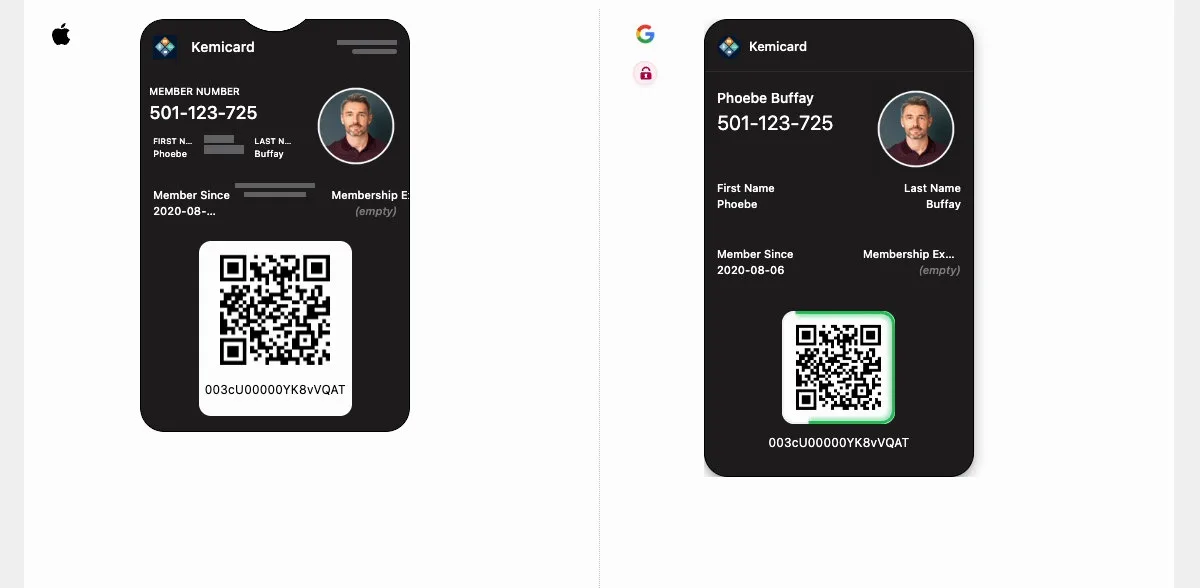
The new Private Image type shows the photo on a standard pass. The image stays private to the pass holder, and no unlock prompt appears. Where screen-lock verification genuinely is wanted, Secure Private Image remains available as a separate option.
Kemicard Studio → Google → Type → Private Image
- In Kemicard Studio, open your template and go to the Google configuration, where the pass Type is chosen.
- Set the Google type to Private Image. Choose Secure Private Image only if you specifically want to require screen-lock verification before the photo shows.
- Point it at the photo — set the image field to the source you want on the pass, for example the member's photo field on the record.
- Click Save, then check the Google preview. The private image appears on a standard pass.
| Google type | Member experience | When to use |
|---|---|---|
| Private Image (new in v2.29) | Photo shows on a standard pass — no unlock prompt. | Member photos, ID badges, everyday membership cards. |
| Secure Private Image | Members must unlock the phone (biometric or screen-lock) to view. | Sensitive content that should be gated behind device unlock. |
Choosing between the three
They solve different halves of the same problem, and they compose:
| The risk | The control |
|---|---|
| Someone photographs the barcode and sends the photo on | Rotating barcode — the photo stops working within seconds |
| Someone forwards the pass itself to another wallet | Sharing controls — Google can refuse the second install outright |
| The person at the door is not the person the pass was issued to | Private Image plus a scanner flow that shows the photo on the result |
For a high-value credential — a staff badge, a season ticket, a transit pass — all three together mean the barcode expires, the pass cannot be re-installed elsewhere, and the attendant can see whose face should be in front of them. The Scanner & Check-In guide covers the last of those.
Troubleshooting
Confirm the Google Rotating Barcode toggle is on and the template was saved, then have the member re-add or refresh the Google pass. The code refreshes on the interval set in Period (Secs) — watch it for one full period before concluding anything.
For rotating-barcode passes, scan the member's Google Wallet pass, not the Apple one. Only the Google pass carries the live rotating code, so scanning the Apple pass will not validate against it.
Google only allows the sharing level to change while no member has saved the pass. Once a pass is in a wallet, Google locks it and the builder shows a “passes have already been generated and saved” message. Set sharing before distributing.
Open the pass's Google sharing settings and choose Fully Shareable (or another level), then save. Existing passes update on their next refresh.
That is the behaviour of Secure Private Image. Switch the Google type to Private Image to show the photo without a screen-lock prompt.
Template changes apply to newly issued passes right away. Passes already in a wallet update when the wallet refreshes them, which can take a little time.
Sources: Google's Rotating Barcodes; MultipleDevicesAndHoldersAllowedStatus reference; Secure Private Images; ViewUnlockRequirement reference.
 Get It on AppExchange