The Kemicard Scanner is a managed Lightning Web Component, so it can run on a Salesforce Experience Cloud site (formerly Community Cloud). Staff, volunteers and venue crews log in to the site and verify passes without full Salesforce access. This guide covers the four settings that make it work, and how to check each one.
Before you start
- An Experience Cloud site with the Kemicard Scanner component on a page. The examples below use a site named Scanner.
- The scanning users, each with an Experience Cloud (Community or Portal) license and profile, for example Customer Community Plus User or Partner Community User.
- A Kemicard license for each scanning user. The Scanner itself needs no extra Kemicard license; the person scanning needs a way into Salesforce (a Salesforce license or an Experience Cloud/Community license) and an assigned Kemicard license. For large crews, ask about an org-wide license (Scanner licensing).
- At least one Kemicard Event. Scanning is tied to an event, so create the events your crews will check people into first.
Step 1 — Add the scanning profiles to the site
Users can only reach the site's login page and authenticate to the scanner if their profile is a member of the site.
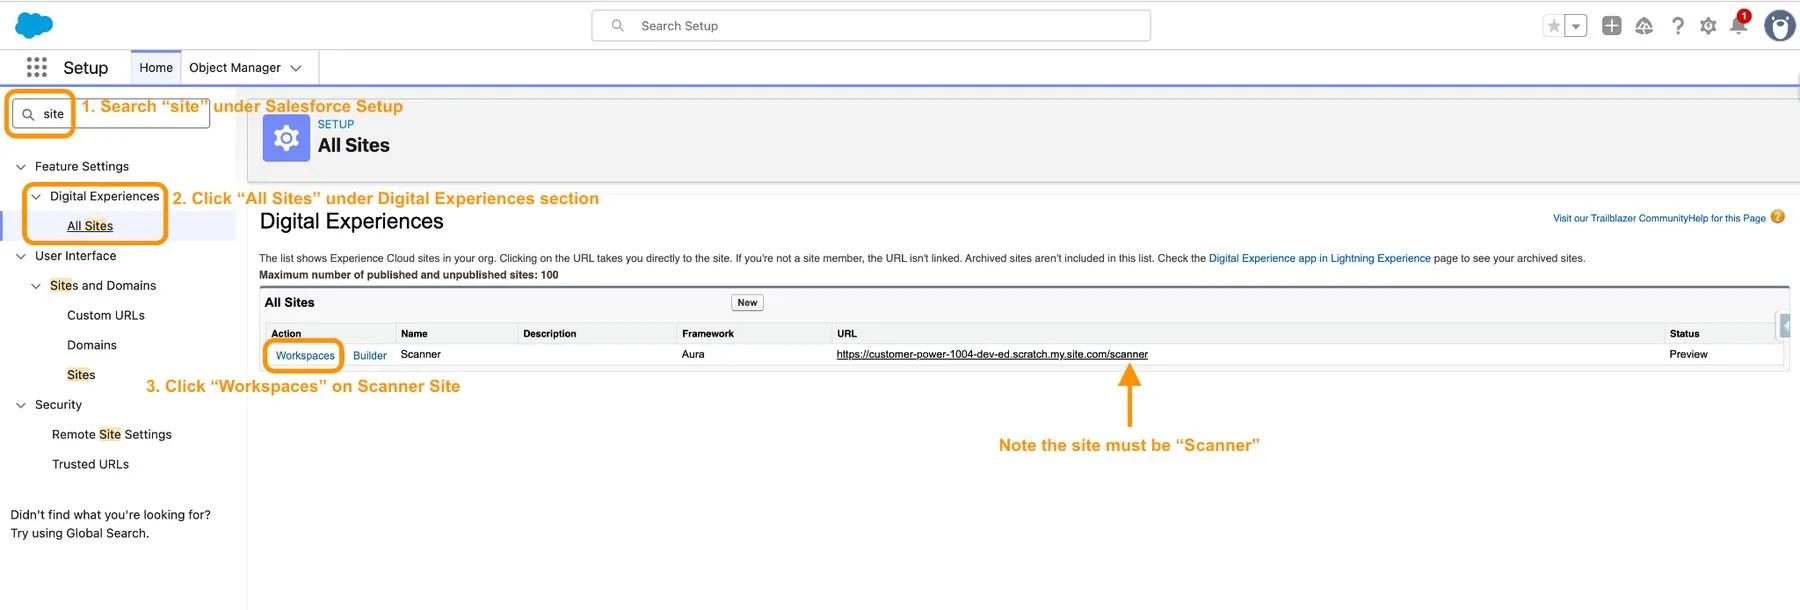
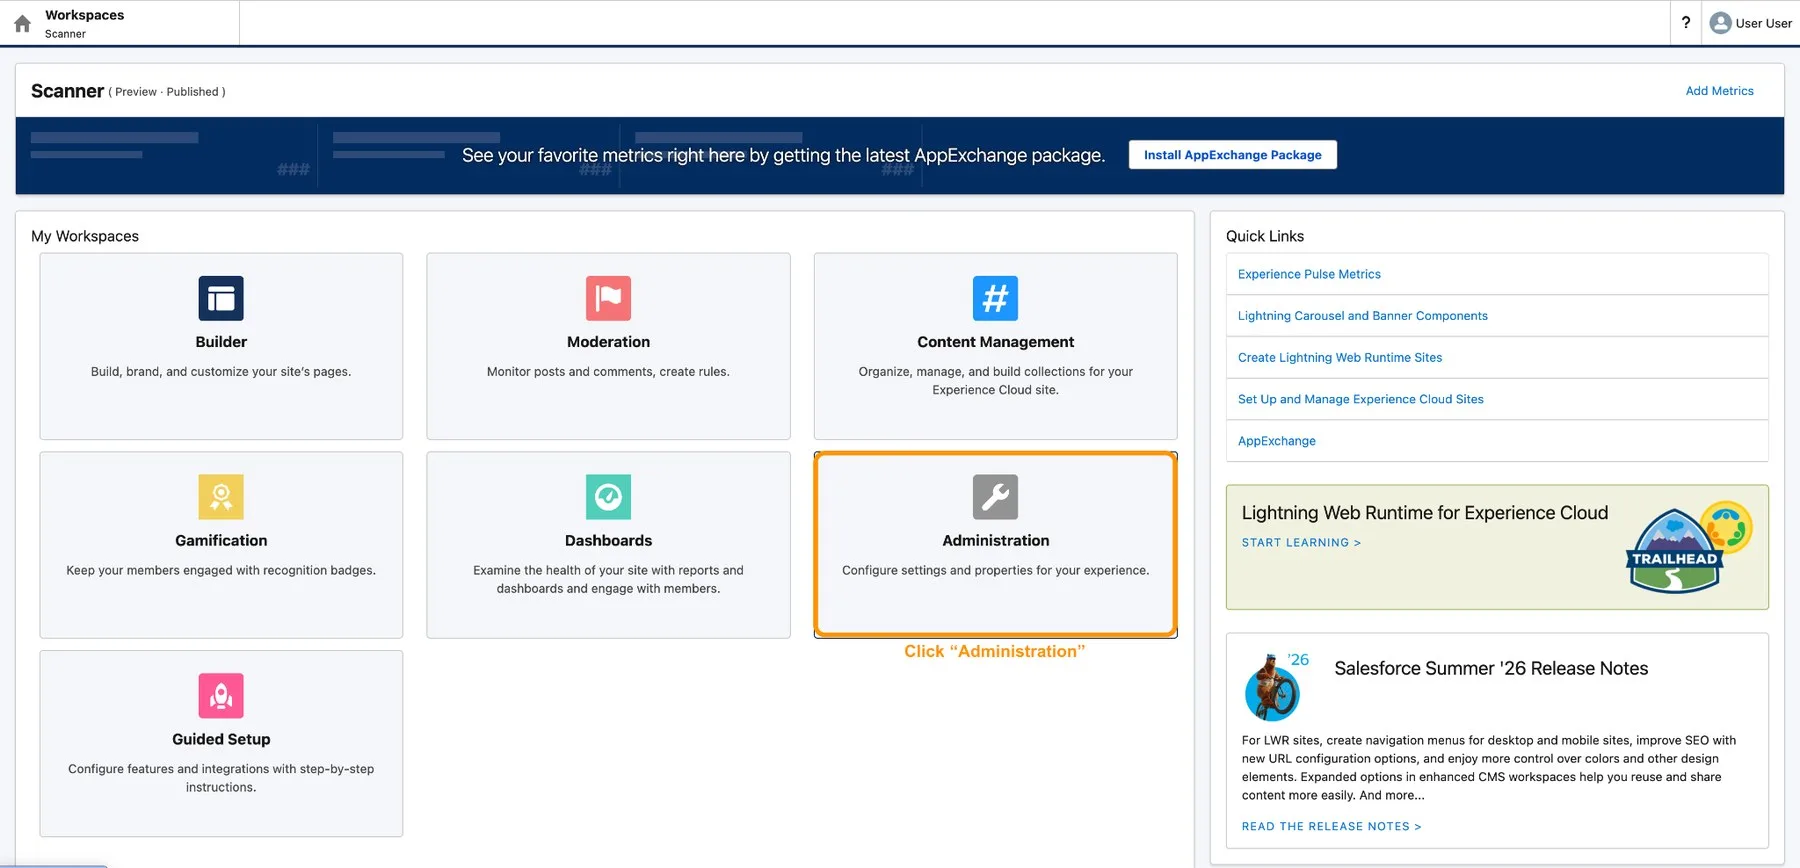
- In Setup, search for All Sites under Digital Experiences, then click Workspaces next to your scanner site.
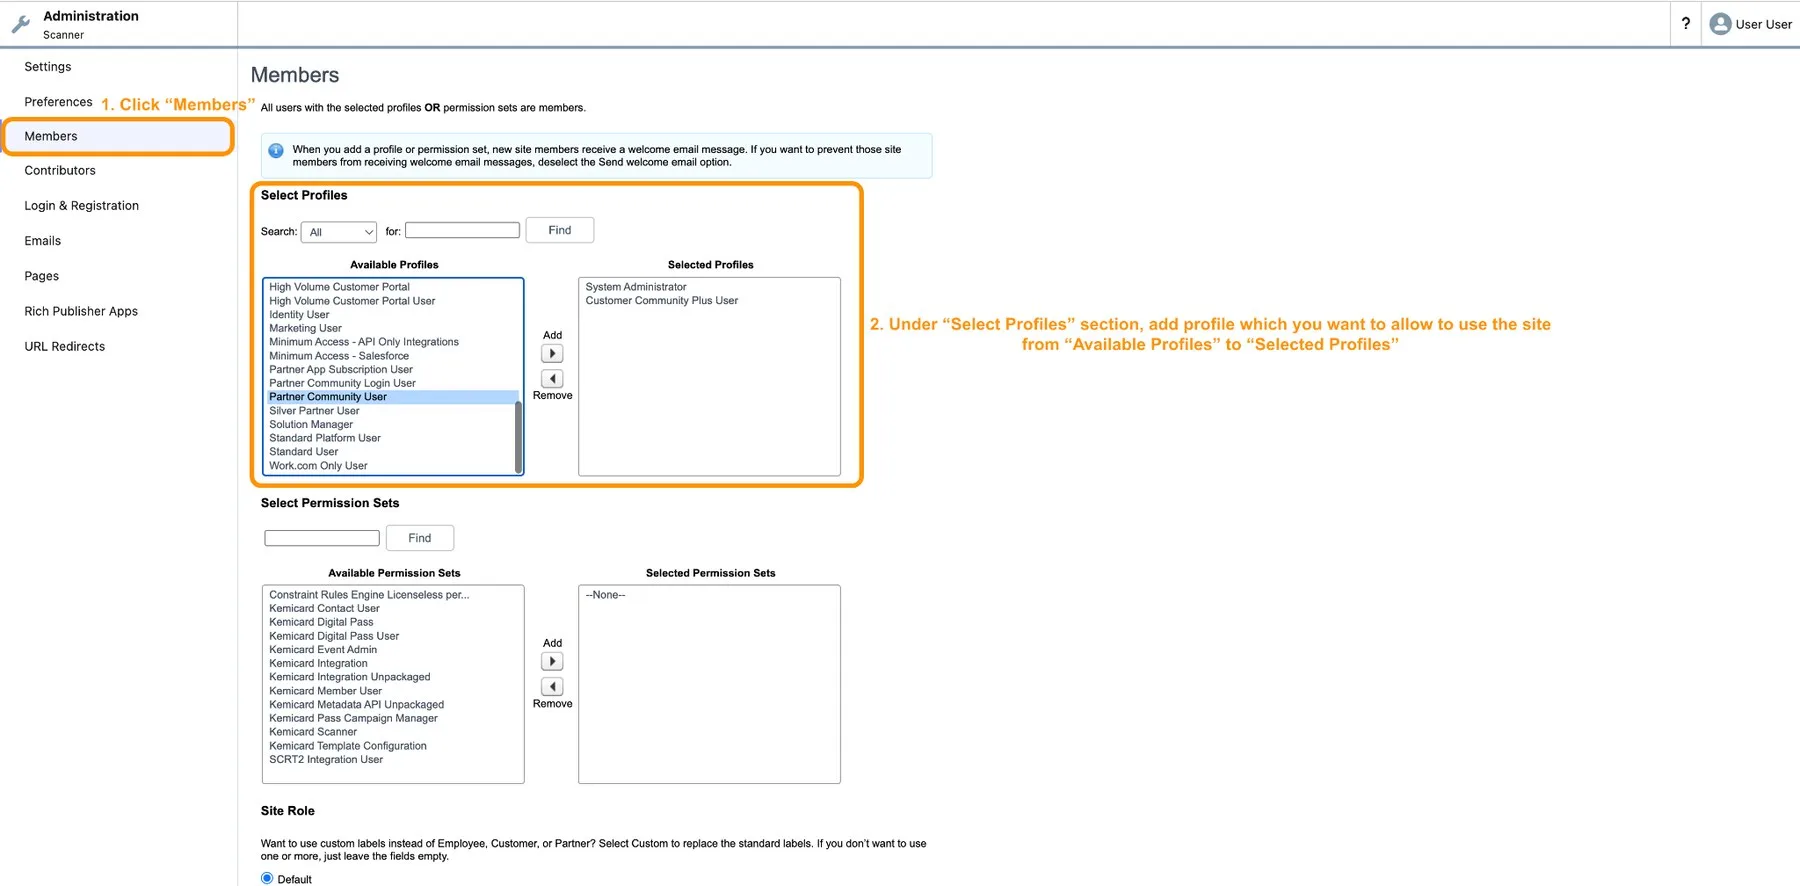
- In the workspace, click Administration, then Members.
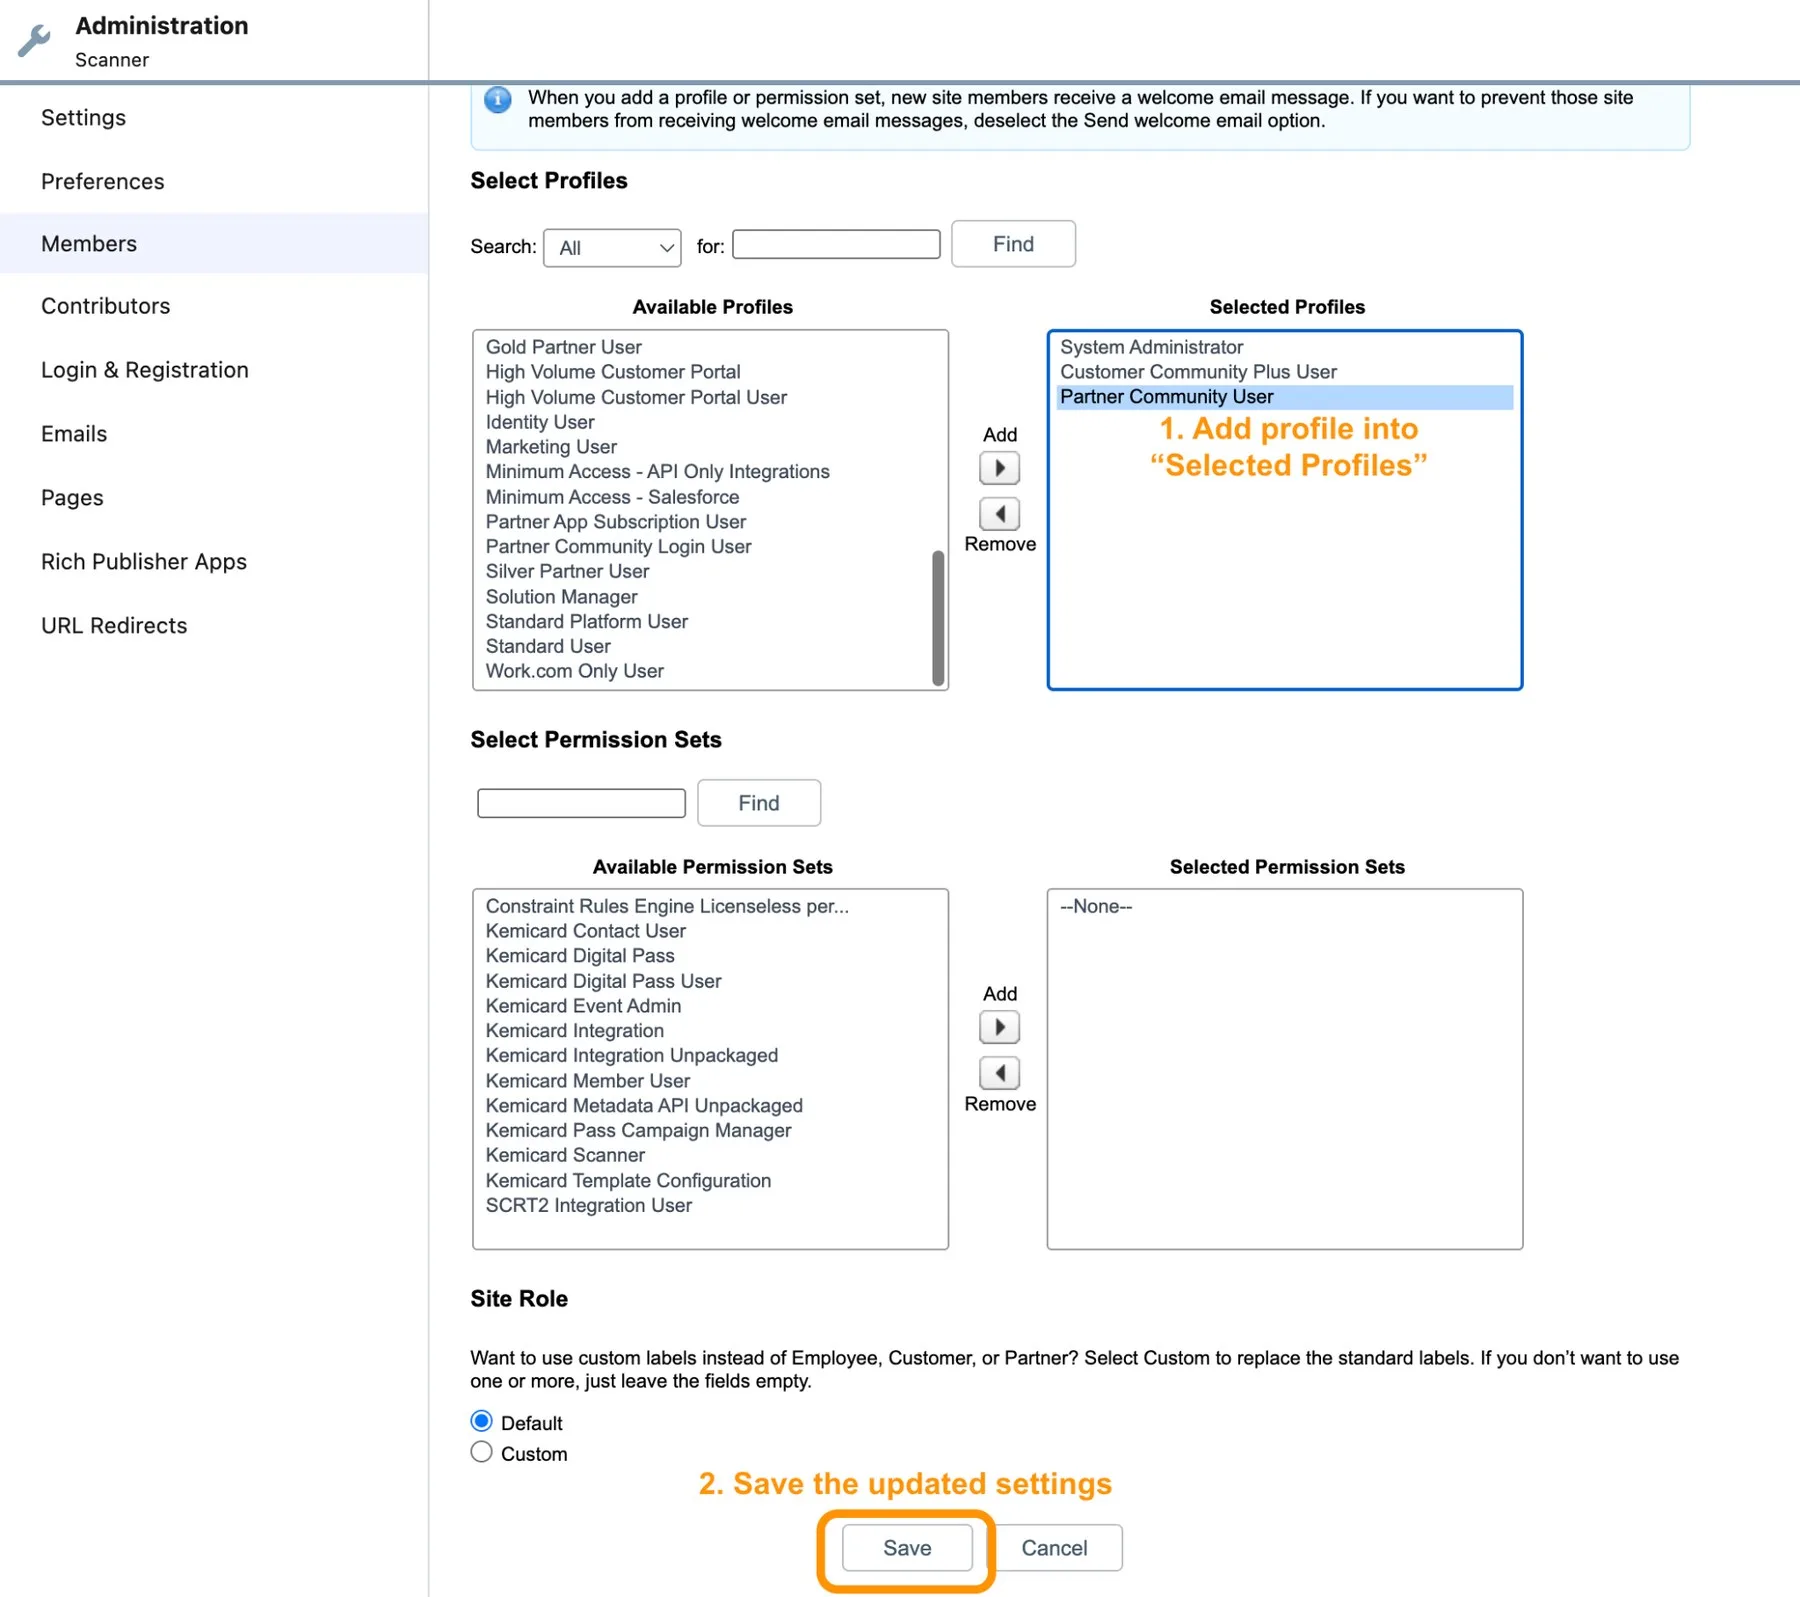
- Under Select Profiles, move the profiles that should use the scanner (for example, Partner Community User) from Available Profiles to Selected Profiles, then Save.
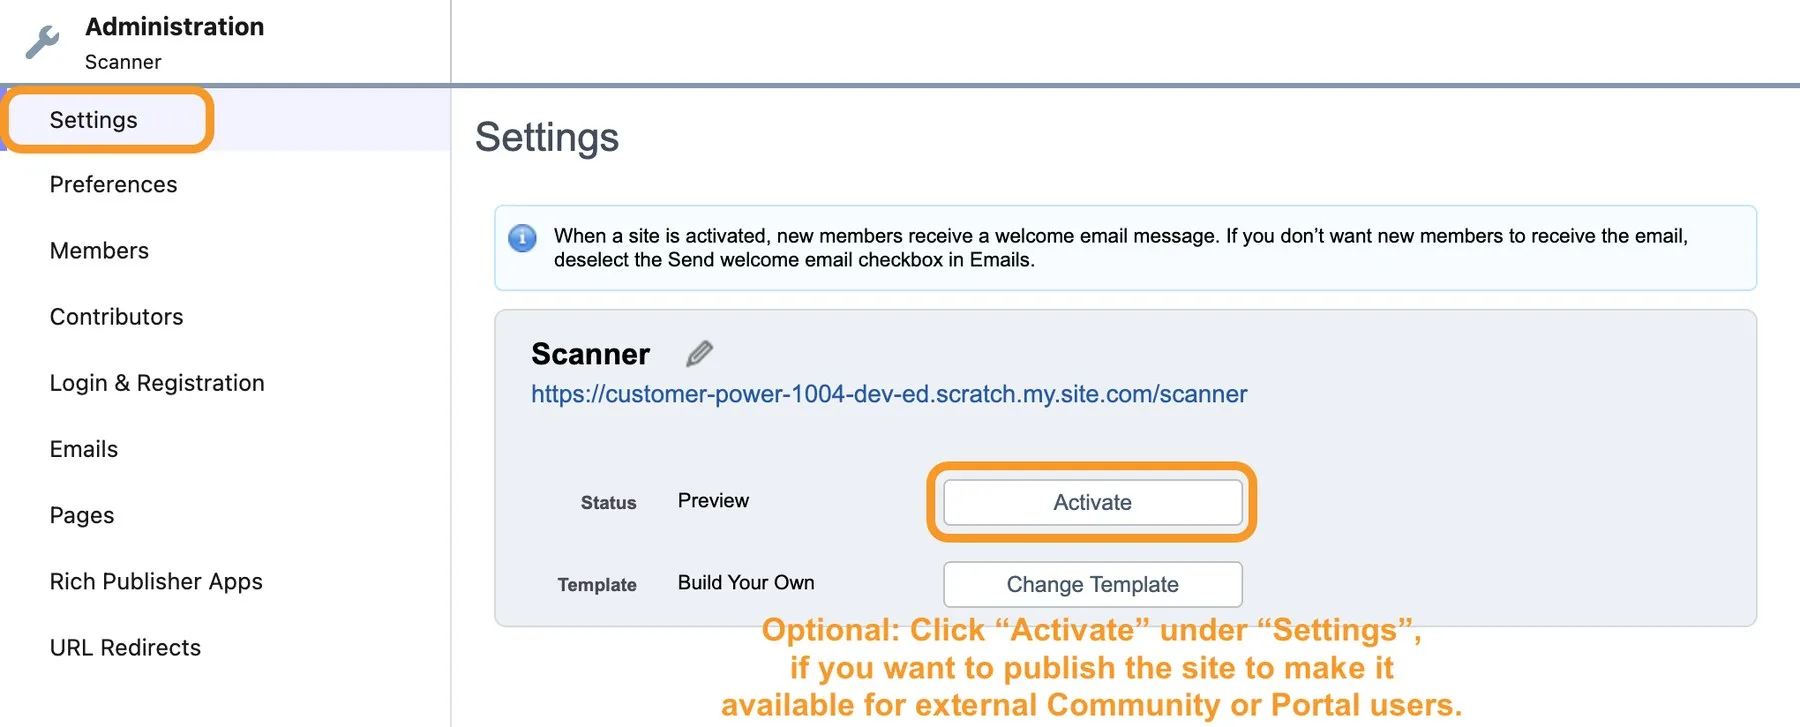
- Optional: to publish the site for external Community or Portal users, open Administration › Settings and click Activate.
Step 2 — Let the site's users read the passes they scan
Logging in isn't enough. When a barcode is scanned, the site resolves it to a Kemicard Pass record and records the attendance, so the scanning user needs Read access to those pass records. If the Kemicard Pass object's default for external users is Private, site users see no pass data and scans fail. Salesforce keeps separate organization-wide defaults for external users, and the usual fix is a sharing rule rather than opening the default.
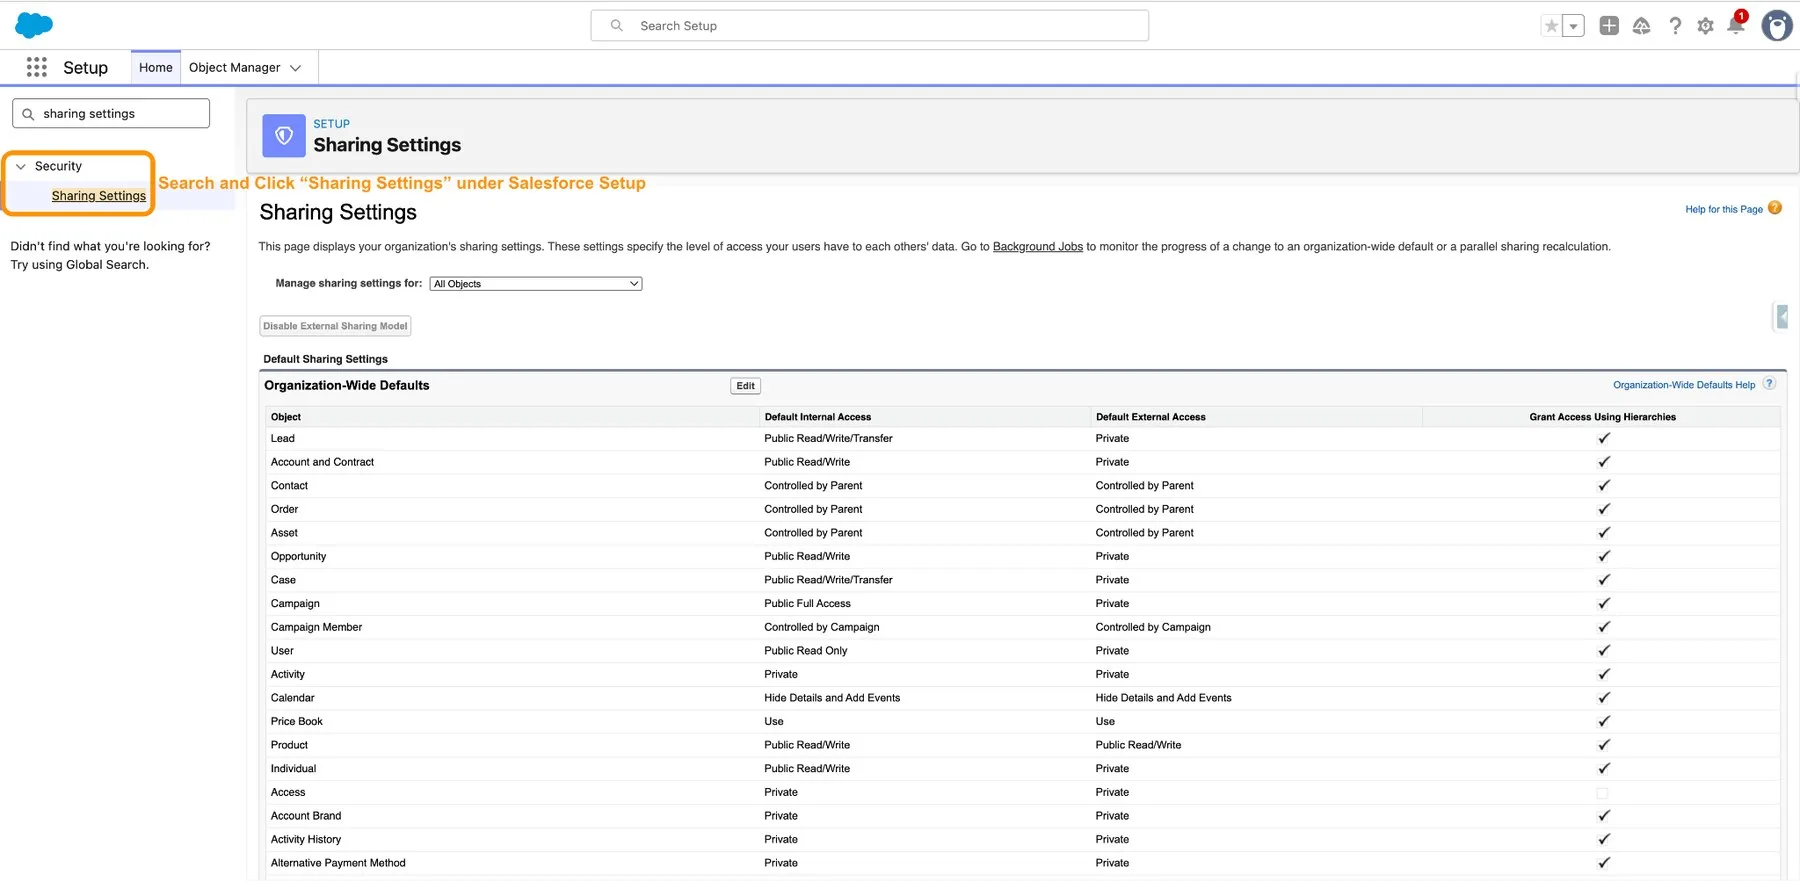
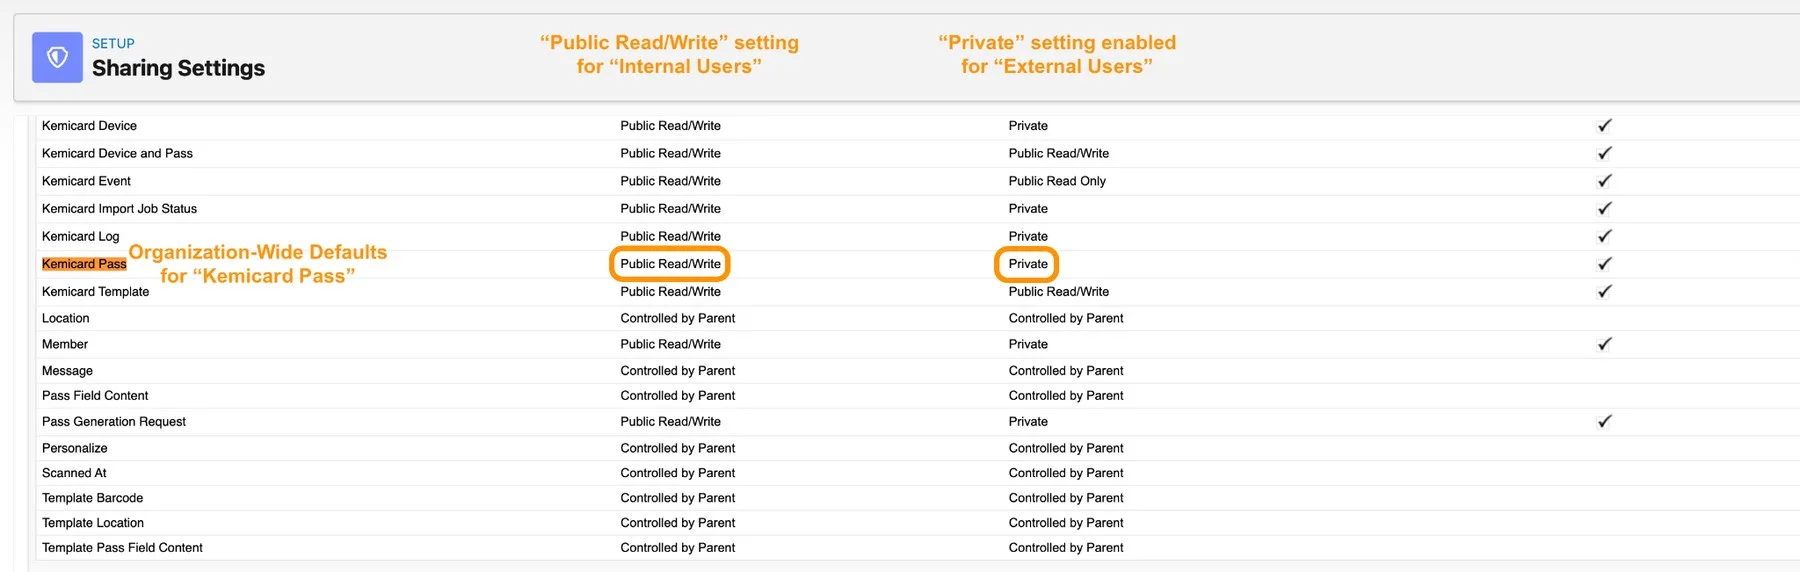
- In Setup, open Sharing Settings and check the organization-wide default for Kemicard Pass. In the example, internal access is Public Read/Write and external access is Private.
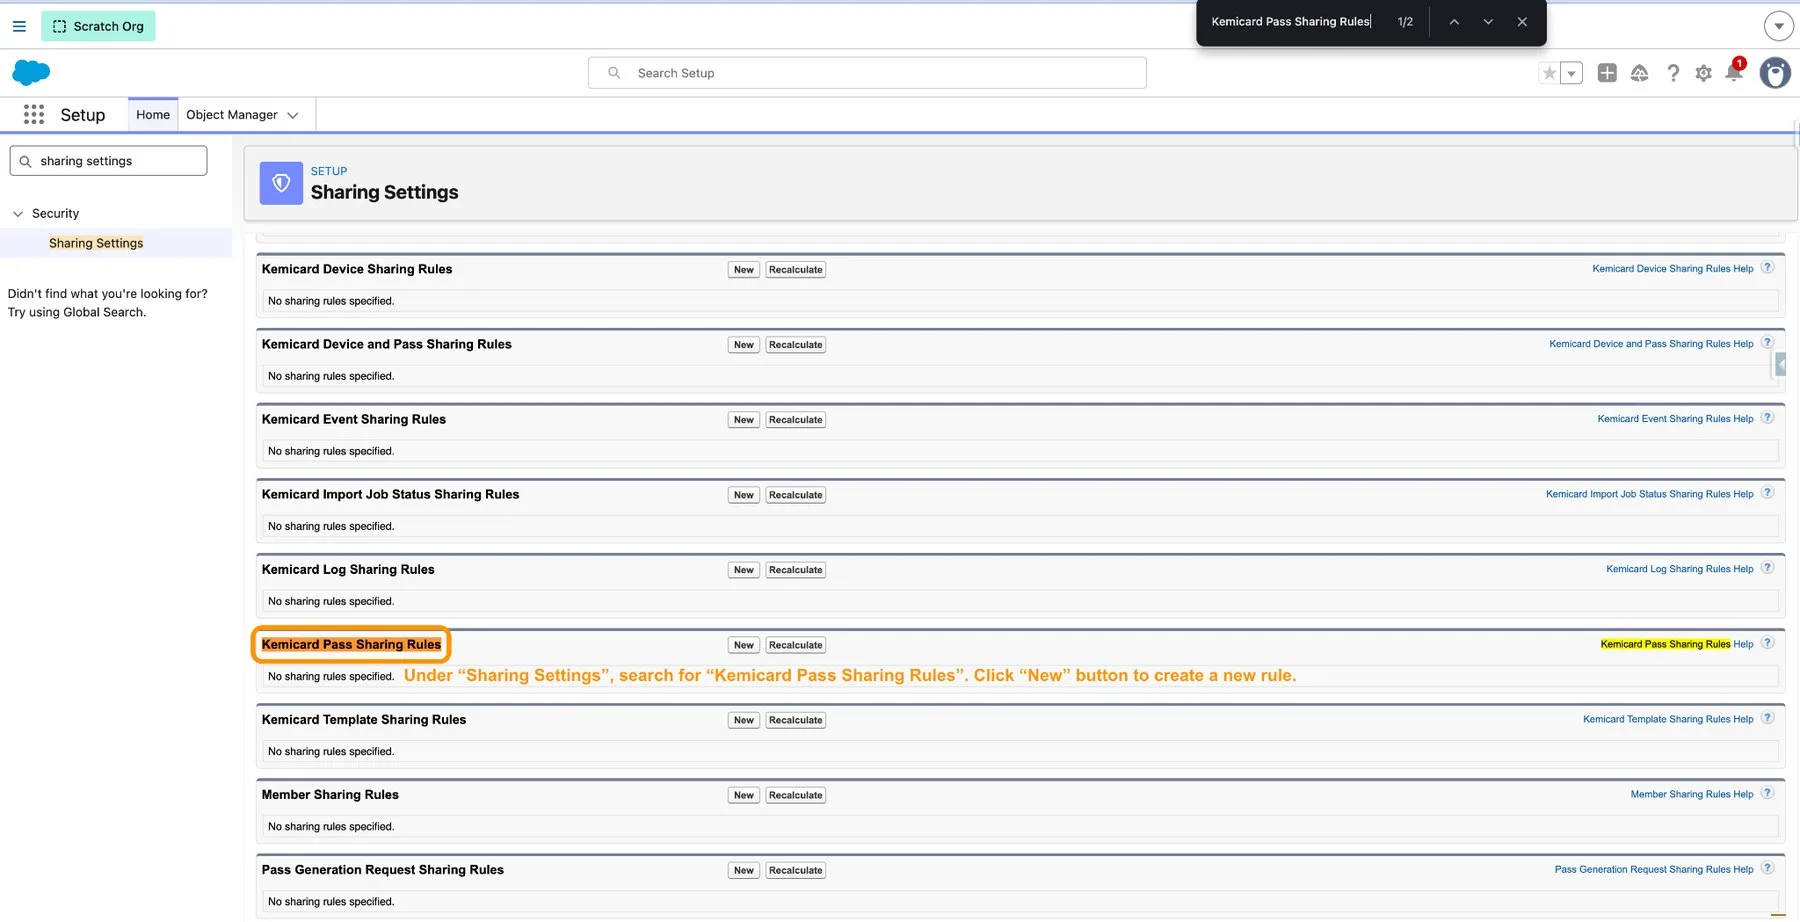
- Under Kemicard Pass Sharing Rules, click New.
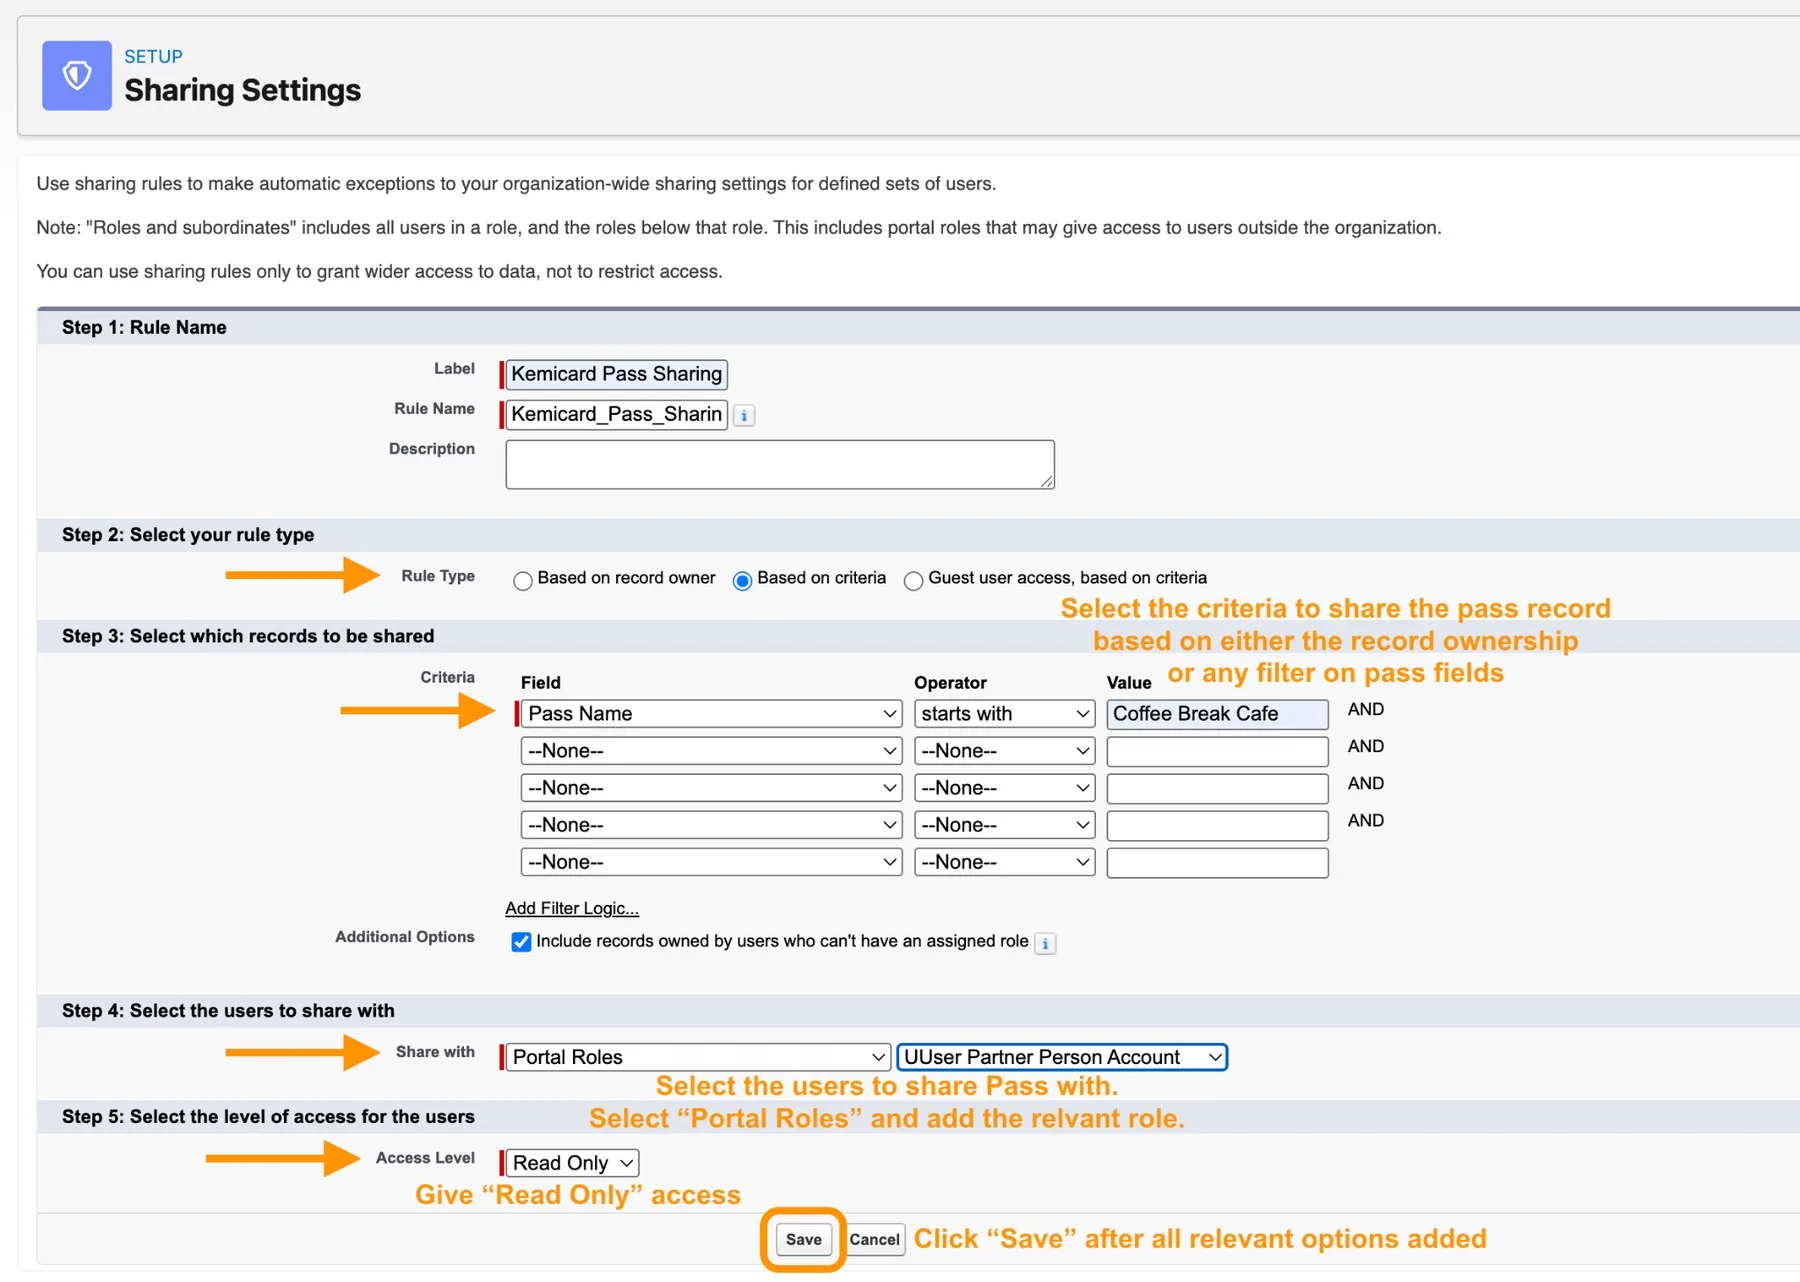
- Choose which passes to share, by owner (for example, passes generated by one user) or by criteria on pass fields (for example, passes for one event's template). Share only what the crew needs.
- Under Share with, pick the external users, for example Portal Roles and the relevant role.
- Set the access level to Read Only and Save. Add a rule for each user type that scans, such as one for Community users and one for Portal users.

Step 3 — Assign the event to the scanning users
The Scanner is context-aware: a user picks an active Kemicard Event before scanning. If someone logs in and sees no events, they haven't been assigned one.
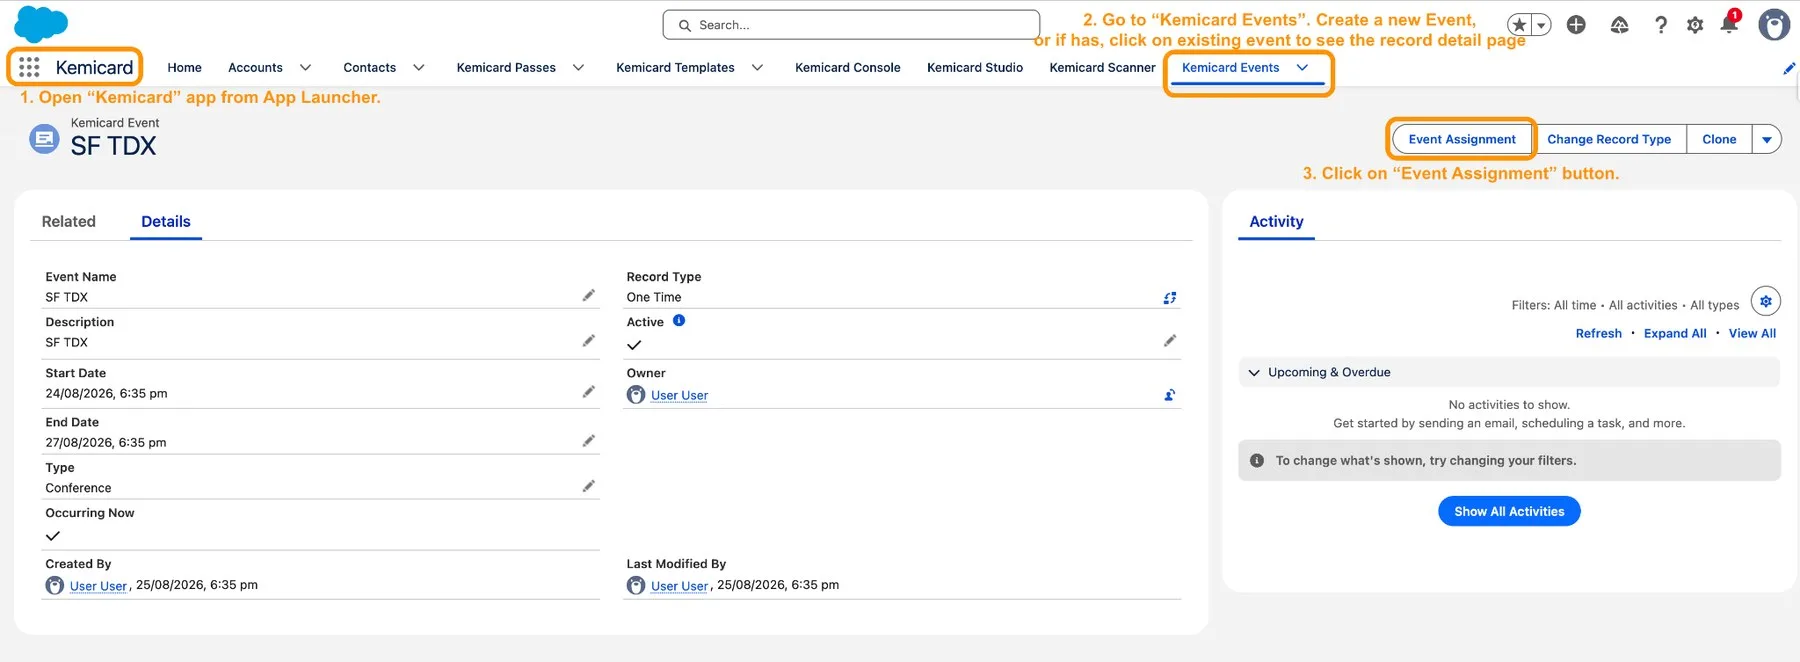
- Open the Kemicard app, go to Kemicard Events, and open the event (or create it).
- Click Event Assignment.
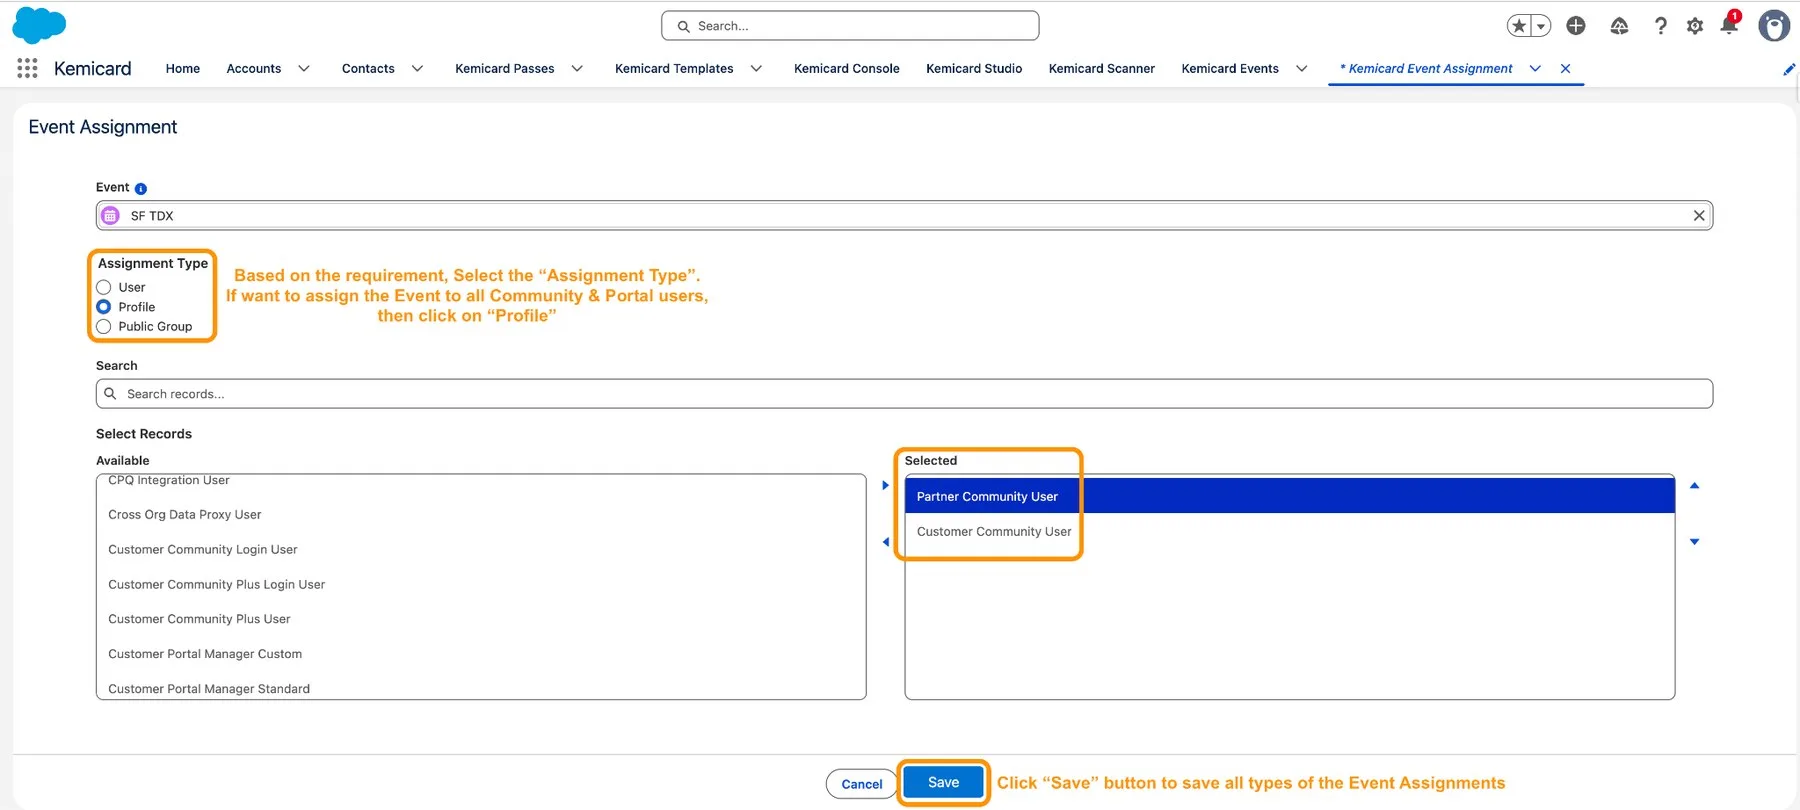
- Choose the Assignment Type: User, Profile or Public Group. To give every Community and Portal user the event, choose Profile.
- Move the users, profiles or groups to Selected, then Save.
The event now appears in the scanner's event list for those users. Setting up assignments needs the Kemicard Event Admin permission set; since Kemicard 2.30, scanner-only users who open Event Assignment see an “Insufficient Privileges” message, and scanning a pass for an inactive event explains why it was rejected.
Step 4 — Assign the Kemicard Scanner permission set
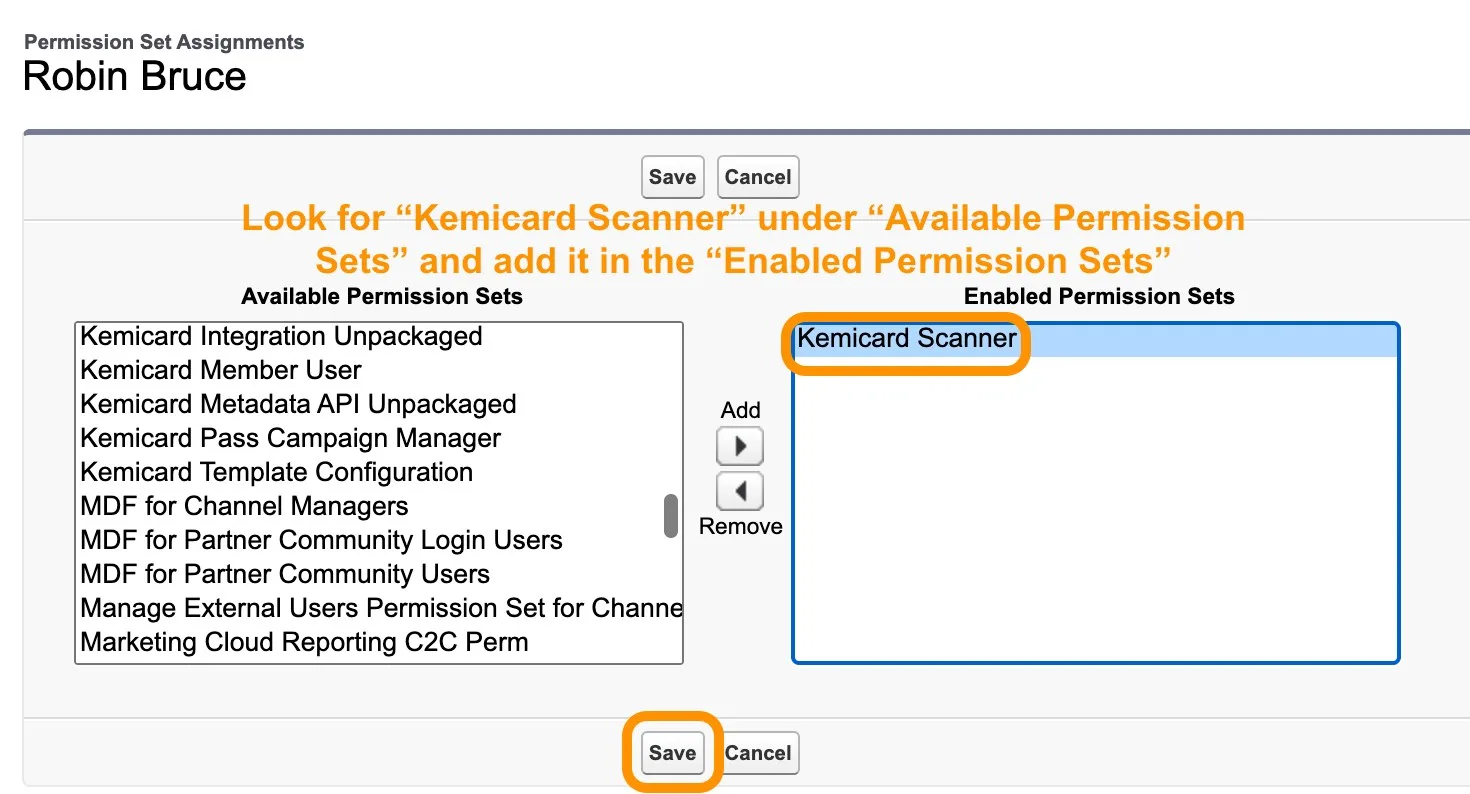
Every scanning user, whatever their user type, needs the Kemicard Scanner permission set (permission set reference).
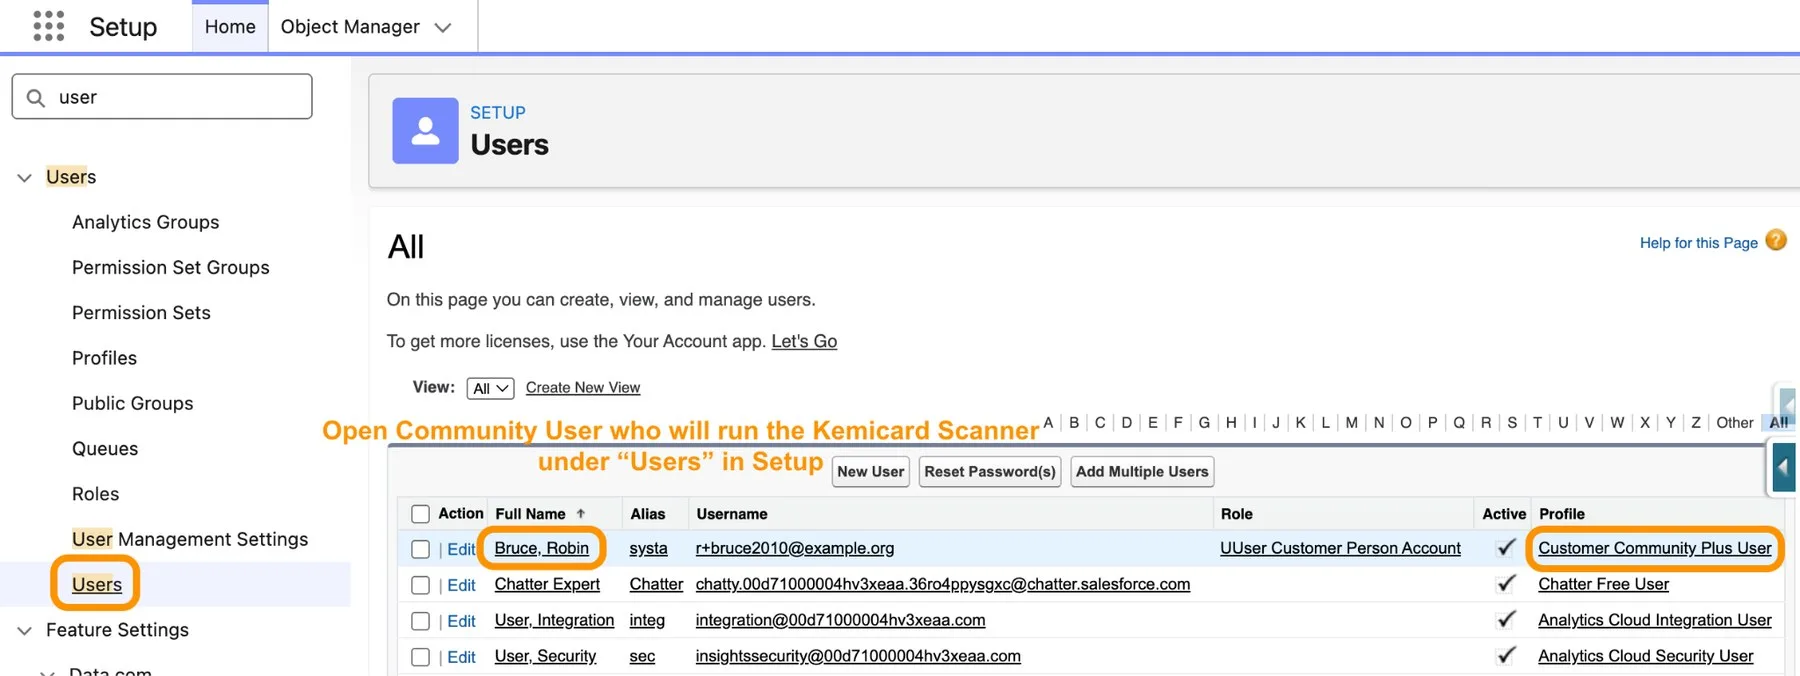
- In Setup, go to Users and open the user who will scan.
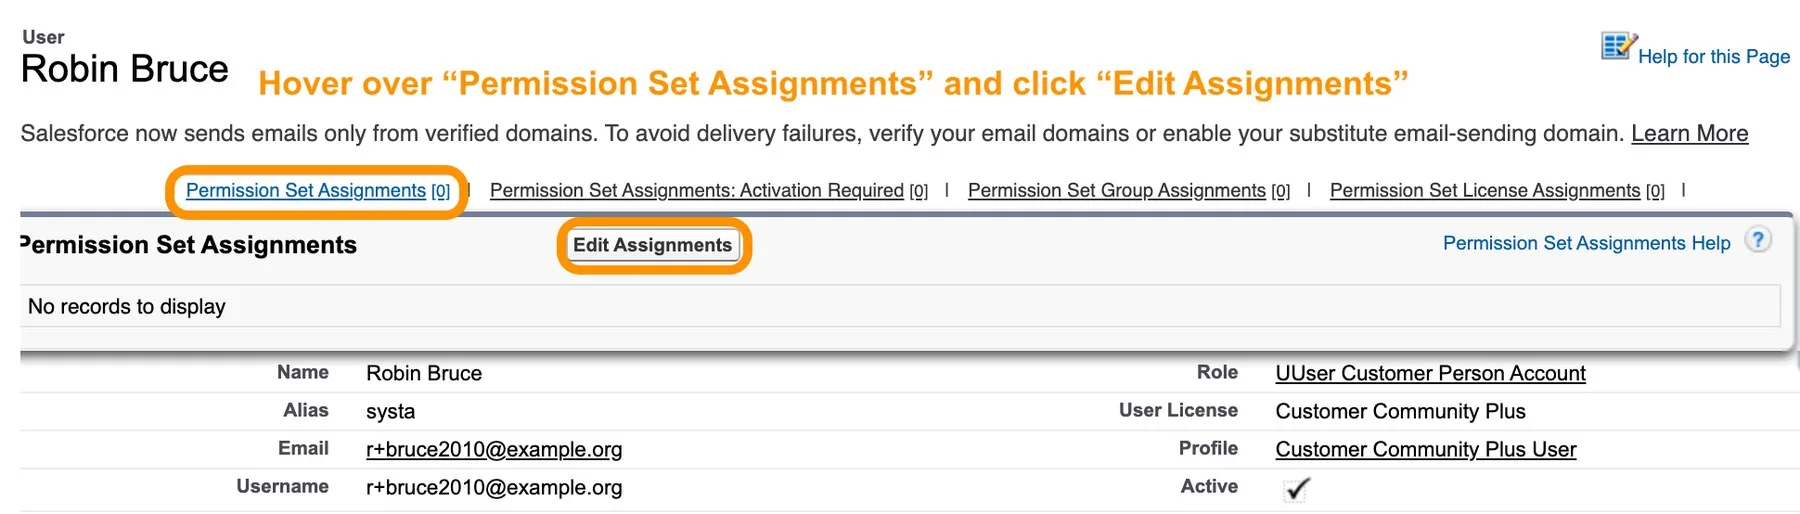
- In Permission Set Assignments, click Edit Assignments.
- Move Kemicard Scanner from Available to Enabled Permission Sets, then Save.
Setup checklist
| Requirement | Where | Why |
|---|---|---|
| Profile site access | Experience Workspace › Administration › Members | Lets the user log in to the scanner site |
| Pass sharing rule | Setup › Sharing Settings › Kemicard Pass Sharing Rules | Lets the user read the passes being scanned |
| Event assignment | The Kemicard Event record › Event Assignment | Shows the event in the scanner's list |
| Permission set | The user record › Permission Set Assignments | Gives the user the Kemicard Scanner |
Running a scan
- Log in to the Experience Cloud site.
- Select the event from the list.
- Click Start Scan and allow camera access when the browser asks.
- Read the result for each pass: Valid, Expired or an error. Each scan is checked against the live record and written back to Salesforce.
The scanner works the same way here as on a Salesforce page or in the Salesforce mobile app: camera or external scanner, identity checks and links. See the Scanner & Check-In guide.
If something doesn't work
| Symptom | Check |
|---|---|
| The user can't reach the login page or log in | Their profile is in the site's Members, and the site is active (Step 1) |
| The user logs in but sees no events | The event is assigned to their user, profile or group (Step 3) |
| The event appears, but scans don't find the pass | A Kemicard Pass sharing rule gives their user type Read access (Step 2) |
| The scanner isn't available to the user | The Kemicard Scanner permission set is assigned (Step 4), and they have a Kemicard license |
| A pass is rejected with an inactive-event message | The event isn't active. Activate it or pick the right event |
Still stuck? Ask your System Administrator, or contact Kemicard support from the Kemicard Console's Contact Support.
Sources: Kemicard Scanner Community Site Setup Guide. Salesforce Help: External Organization-Wide Defaults Overview; Trailhead: Set Up Your First Partner Site (site members), Improve Data Security with Sharing Rules and Manage Salesforce Object Access (permission sets).